How to make and use Spinach Tofu Ricotta

Tofu Spinach Ricotta                                                                                                                          By: Erik Hoffman                                                                                                                        Serving size: double for a lasagna tray

Ingredients

  • 1 block firm tofu
  • 8 ounces baby spinach
  • 1 clove garlic minced
  • veggie broth for sautéing
  • 3 T nutritional yeast
  • ½ a lemon zested (microplane preferred)
  • 1 lemon juiced
  • Salt and pepper to taste

Directions

Step 1:  Remove the excess liquid from tofu.  To do so, place tofu in a colander with a paper towl on top.  Add a heavy object like bowl on top of paper towl and let strain for at least 10 minutes.

Step 2:  Add garlic and a thin layer of veg stock to a pan and sauté for about 2 minutes.  Next, add spinach until wilted.  Remove from heat, then place in a colander to drain excess liquid.

Step 3:  Once pressed, crumble tofu by breaking it apart with your hands and place in a food processor.  Add the drained spinach, nutritional yeast, lemon zest, lemon juice, salt and pepper.  Blend until smooth and creamy.

If it’s too thick, add a few tablespoons of veggie broth to thin out.  Then taste.  Add more salt and or pepper to your liking.  You may also add more nutritional yeast for a cheesier flavor.

How to use:

  • In veggie lasagna:  we served it to our ideal customers for feedback (who aren’t plant-based eaters) and they loved it.  Layer the ricotta over 100% whole-grain lasagna noodles and sautéed veggies (zucchini, eggplant, mushrooms, peppers, onions and broccoli), tomato sauce then bake
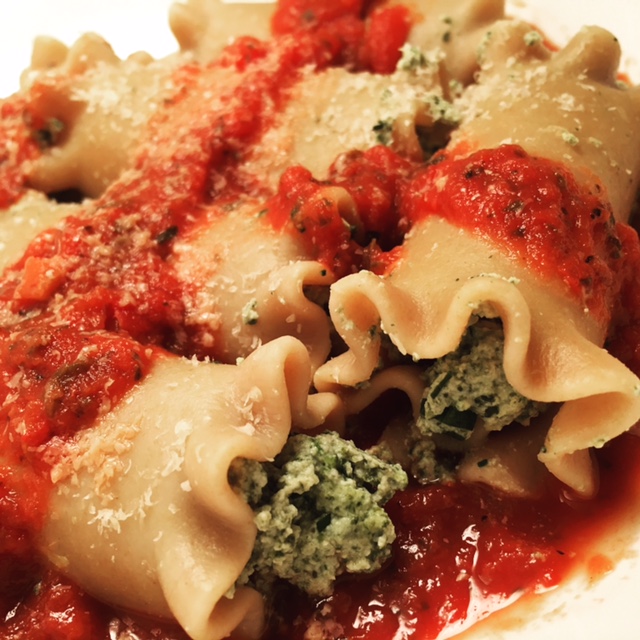
  • Use for stuffed shells
  • Manicotti filling
  • In baked stuffed cherry tomatoes (hollow out cherry tomatoes and fill with tofu ricotta. Bake at 400 degrees until heated through) 
  • Cheese on a pizza
  • Spread for toast

Take Control Now

Erik and I are challenging you to make Spinach Tofu Ricotta this week.  Answer in the comments section and share how you'll use it, when you'll shop for ingredients and when you'll make it.  The more specific and detailed you are, the more likely you are to follow through on this goal.  Take the first step toward making a healthy, tasty, cheesy dinner by answering below. 

3 reasons to avoid high animal protein diets and the science behind them

In the last 5 years, have you ever attempted a high-protein, animal-based diet to lose weight?  Think Atkins, Paleo, South Beach, Sugar Busters... any of these ring a bell?  What happened when you first adopted the diet?  My hunch is you lost weight.  Originally.  Is this correct?  My next hunch is that years maybe even months later, the weight returned, and possibly and some!  Not surprising (unfortunately), as the science follows this pattern as well.  

3 reasons to avoid high animal protein diets and the science behind them

1.  Animal protein Increases risk of weight-gain and diabetes.

Science continues to show that high-protein diets are associated with weight-gain (1), (2) diabetes (1) and even death! (3).  Ahh!  Who cares about losing a few extra pounds if it's going to knock years off your life or increase your chances of gaining weight in 5 or 10 years?  


Multiple studies have show that as the amount of animal food in the diet increases, BMI increases.


The Adventist Health Study II (1) followed 22,434 men and 38,460 women (60,894 people) for 4 years.  Vegans (those consuming no animal products) were the only group to experience a normal BMI.  As the amount of animal food in the diet increased, weight-gain increased as well.  

This isn't the only large cohort study to find an association between weight-gain and meat consumption.  The EPIC-PANACEA study followed 103,455 men and 270,348 women (373,803 people) to assess the association between meat consumption and weight gain over 5 years.  What'd they find?  "Total meat consumption [including poultry] was positively associated with weight gain in men and women, in normal-weight and overweight subjects, even when adjusted for energy intake" (2).  This means, that even if you’re eating the same amount of calories of animal food compared to plant food, you’re still more likely to gain weight just from eating meat.  Yowzers!

2.  High-protein diets are associated with an increased risk of death.

The Journal of Clinical Nutrition published an article (3) conducting a secondary analysis of the PREDIMED trial, a large randomized control trial of 7,447 older adults at high cardiovascular risk.  The researchers measured participant's dietary intake with a food frequency questionnaire.  The researchers found those eating the largest amount of animal protein as a percentage of energy, had a 69% greater risk of all-cause death than those eating the lowest amount of animal protein after adjusting for cofounders.  Participants eating the most animal protein, also showed a significant risk of cardiovascular events and death from cancer, cardiovascular and all-cause death.

3.  High-protein diets aren't sustainable to eat over the long-term.  

Ideally, we should be able to maintain a diet for years and experience continual health improvements if it is indeed good for us -- not short-term results, with an increased risk of harm later in life.  

With the continued prevalence of high-protein diets in American culture, it's easy to eat a high-protein, animal-based diet even if you aren't following a prescribed diet per say.  Are you eating animal foods (cheese, yogurt, meat, chicken, fish etc.) everyday?  How many times a day?  How many times a week?  Consider swapping animal-based meals or snacks for those from plant-origin to reduce caloric intake and eat those fruits, veggies, whole-grains and legumes Americans aren't eating enough of.  There's an abundance of recipes and kitchen tips to help you get started on the blog.

Now it's time to hear with you.  Please share this article, then answer by clicking 'comment' below.

Take Control Now

What did you learn from this article?  How many times a week do you eat animal foods?

References

1.  Tonstad, S et al. Type of Vegetarian Diet, Body Weight, and Prevalence of Type 2 Diabetes. Diabetes Care. 2009 May; 32(5): 791–796.

2.  Vergnaud AC et al. Meat consumption and prospective weight change in participants of the EPIC-PANACEA study. Am J Clin Nutr. 2010 Aug;92(2):398-407. 

3.  Hernández-Alonso, P et al. High dietary protein intake is associated with an increased body weight and total death risk. Clin Nutr. 2015 Apr 7. 

Erik's Basic Stock Recipe

There's many reasons to keep vegetable stock on hand at all times. When cooking without oil, vegetable stock is great for sautéing and adds flavor.  It’s also great for almost any soup and is a flavorful addition to sauces or purées that are thicker than you desire.  

Now, this is a very basic recipe which leads itself to some interpretation but, I promise if you stick with this basic formula, you can't go wrong.  You'll notice the recipe doesn't call for veggie scraps or ends.  Use the whole veggies to lend the most flavor.  I take pride in a good veggie stock -- it’s an integral ingredient and flavor agent for a variety of different foods.  It should be as good an ingredient as any other.  Take care in your stock.  

Erik’s Basic Vegetable Stock Recipe

Ingredients

  • 2 parts prepped white onion
  • 1 part prepped carrots
  • 1 part prepped celery
  • 1 whole unpeeled head of garlic (not clove, head)
  • Fresh herbs: thyme, rosemary, oregano, bay leaf, parsley (any or all)
  • Spices: whole black peppercorns, red pepper flakes and salt  (any or all)

Directions

1.  Prep onions.

Cut off both ends and peel. No skins in the stock. They’re dirty and bitter. Cut in half through the center then cut each half into thirds. These are going to be somewhat large pieces so they don’t  boil down to mushy blah-ness during the cooking process.

2.  Prep carrots.

Peel, then cut off tops. Cut in half length wise, then lay cut side down and slice on a bias into ½ inch slices (bias is a slice on a 45 degree angle).  Take a carrot that looks like this >>======>  and cut into this  >> / == / == / =>

3.  Prep celery.

Cut off the root end.  It’s dirty and bitter. Use the bright green stalks on the outside of the bunch for stock. Now I'm not saying trash the leaves and light green stalks in the middle -- these are much better used in other preparations where heat is not involved (middle pieces have more intense in flavor; the leaves taste great in mock tuna and chicken salads; and they get bitter when you cook them).  Back to the green stuff… cut celery on a bias as well, just like the carrots.


ERIK Insight
Why the bias cut you ask? Well when you cut on a bias you create more surface area than cutting straight across the vegetable which helps to extract the most flavor.

4.  Prep garlic (heads up, geography lesson coming at ya).

Identify the root end of the garlic as Antarctica and the bunched up end as the North Pole.  Then slice the garlic in half through the equator. No need to peel the papery skin.  


ERIK Insight
When it comes to garlic in my stocks, I usually use 1 head for every 3 onions. If you use 6 onions, use 2 heads of garlic.

5.  Prep herbs and spices.

I usually add herbs whole with the stems.  Add 2-3 bay leaves and 4-5 sprigs of each herb per every 3 onions (If you haven’t noticed yet, I pretty much base this entire recipe off of how many onions I have).  I use about 1 tablespoon of whole black peppercorns and 2 pinches of crushed red pepper per 3 onions. 

6.  Get cookin'.

Find a large enough pot to hold all of the ingredients plus enough water to cover them by about 3 to 4 inches.  Start the pot over medium high heat with about a centimeter of water.  When the water starts to boil add all of your vegetables, including garlic, but not the herbs and spices.  Then, salt well (about 1 tablespoon).  The addition of salt at this stage helps pull out the moisture in the vegetables, kind of steam themselves and keeping from browning or caramelizing. Cook over medium heat, stirring every once and awhile until the onions become translucent.  Once translucent, add herbs and spices and stir for a minute or two.

Now add water. Cold water. The colder the better, seriously. Add enough water so the vegetables are covered by 3-4 inches. The strength and flavor of your stock is completely dependent on the amount of water you add here. More water = less flavor.  Turn the heat to high and bring your broth to a boil. As soon as it starts to a boil, reduce the heat to a simmer for 40 minutes tops, no longer (if you cook veggies for too long they start to break down too much and it brings out an almost decomposing flavor like old cut grass or dead leaves).  


ERIK Insight   
Cold water interrupts and then restarts the cooking process, bringing out more flavor in the veggies.

7.  Strain stock.

Once 40 minutes is up, strain the stock carefully through the finest strainer you have and then your done. Presto. Beautiful, flavorful, golden vegetable stock.  Store in the fridge or freeze in ice cube trays for easy access later.

Peace, love and vegetables,

ERIK

P.S. I'd really appreciate your feedback.  Please answer below and share your thoughts.

Take Control Now

Did you find Erik's tips and insights helpful?  If so, which ones?  What did you learn from this post? Any questions Erik can answer for you?  

Erik's Black Bean Burger

Erik's Black Bean Burger                                                                                                                    By: Erik Hoffman                                                                                                                                  Prep and cook time: 40 minutes                                                                                                     Serves: 7 patties

Ingredients

  • 2 15 oz cans black beans rinsed
  • 4 T ketchup
  • 2 t dijon mustard
  • 2 cloves garlic minced
  • 1 medium white onion diced
  • ¼ c red bell pepper diced
  • 3 T parsley chopped
  • 1 scallion thinnly sliced
  • 1 T kosher salt
  • ¾ c instant oats
  • water or veggie broth for sautéing

Directions

1.  Pre heat oven to 400 degrees.

2.  Mash beans.  Drain and rinse beans and place in a large mixing bowl. Mash beans with a fork or in your hands until they’re evenly broken down.  You should be able to still tell they’re beans. Don't mush them until they turn into paste.

3.  Saute veggies.  With enough water to just coat the bottom of a saute pan, cook over medium heat the onion, garlic and red pepper for about five minutes until translucent.  Add to black bean mash.

4.  Add the rest.  Incorporate the rest of ingredients. Then mix in oats. Wait 2 minutes for oats to absorb the moisture and better bind the mixture.

5.  Form into patties. I get about 7 burgers out of this mixture. I like to make the patties a little on the thinner side so when they cook, they get a nice sear on the outside and are not too mushy on the inside so they are easier to eat… i.e. not sloppy or falling apart.

6.  Bake burgers.  Place patties on a non-stick baking sheet or silpat and cook for 8 minutes. After 8 minutes carefully flip and cook for an aditional 8 minutes. The outside of patty should be fairly crisp. Let set for two minutes then serve on bun, bread, salad, wrap or pita with ketchup, mustard, pickles, relish, avocado, hot sauce, salsa, or what ever your heart desires. Enjoy.

What's your favorite veggie burger topping?  What do you think of Erik's burger?

How daily desserts can help you stop eating sweet treats

Have you ever been on a diet and been told “you can never eat (enter your favorite dessert here) again?”  Or on the flip side, you love (enter favorite here) so much that it’s always in your house so you eat it all time? 

How do you stop eating indulgent sweet treats on the regular without swearing them off for life?  The answer lies behind “the double D."  Nope, I’m not talking bra sizes here ladies.  Rather, “daily desserts.”  Daily desserts are 100% healthy foods that satisfy dessert and sweet cravings.  Here’s a few examples...

Daily Desserts:

The trick is to keep your kitchen stocked with daily desserts well, daily.  Always have frozen fruit, dates, cocoa powder and maple syrup in the kitchen, this way, you’re always ensured a yummy daily dessert.

At the same time, you have to get the tempting treats out of the house and you can’t bring them into the house either.  This is worth repeating:  “Get the treats -- cakes, cookies, candy, ice-cream -- out of your kitchen.”  If you don’t, it’s only a matter of time until you eat them.  If you go to a party and are offered to bring the left-over cake home -- don’t do it.  If you do, you’ll eat it.  If you have a party and there’s dessert left-overs, have someone else take it home, bring it to work for others or, throw it away.

This doesn’t mean you can’t ever eat tempting treats ever again, but what living by “the double D” does do, is allow you to eat guilt-free desserts on a regular basis.  How can you gauge if it’s a good time to eat a tempting treat or not?  Ask yourself this question -- “Is this a special occasion outside of my house?”  (Think wedding anniversary, Christmas dinner...).  If the answer is yes, then it’s okay to eat a treat.  No guilt.    

Even vegan tempting treats should not be in the house on a regular basis.  If I kept this amazing and easy Sweet Treat Chocolate Pudding in my house all the time, my husband and I would eat a  pound of chocolate chips every week.  Although it’s made with tofu instead of dairy, it still doesn’t make the “double D” list (but if you need a sweet treat -- it’s a good one).  

Now I'd love to hear from you.  Click 'comment' below and answer...

Take Control Now Question

What are your favorite daily desserts?  How has getting treats out of your kitchen helped you eat healthier?